 Save
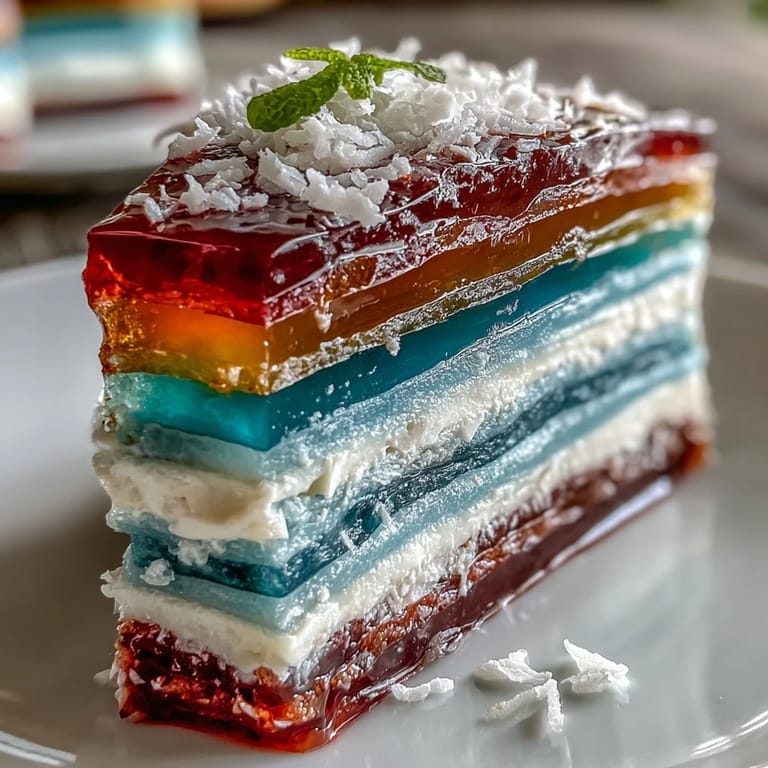
Save When the temperature outside feels like a warm embrace, my kitchen becomes a laboratory for anything chilled and shimmering. That was how this Rainbow Jelly Cake first came to life, while I was hunting for a dessert both dazzling and entirely dairy free for a neighborhood picnic. I still remember hearing a gentle wobble as I nudged the colorful mold in the fridge, secretly excited for the big reveal. What I didn't expect was the almost hypnotic pattern painted across each slice when the knife finally cut through. Somehow, summer afternoons feel a little livelier with those jewel-like layers on everyone’s plates.
One afternoon, my friend Mei helped me pour the colored layers while our favorite playlist bounced in the background. We laughed over accidentally splattering color onto the counter and had to devise a fix with a damp towel while waiting for the next one to set.
Ingredients
- Agar-agar powder: Essential for jelly structure (I always double-check it’s properly dissolved—lumps make for odd bites).
- Water: Adjusts the firmness; exact measurements help each layer settle evenly.
- Granulated sugar: Sweetens just enough without overpowering—sometimes I taste the syrup before dividing for color.
- Food colorings: The heart of the rainbow—using gel drops helped me get vibrant tones without thinning the mixture.
- Vanilla extract (optional): Adds gentle fragrance, especially if skipping extra flavorings like rose or pandan.
- Coconut cream: Elevates the final layer to creamy, tropical bliss—stir well to avoid separation.
- Salt: Just a pinch turns the coconut from sweet to almost caramel-tinged.
Tired of Takeout? 🥡
Get 10 meals you can make faster than delivery arrives. Seriously.
One email. No spam. Unsubscribe anytime.
Instructions
- Bloom the agar-agar:
- Combine agar-agar powder and water in a saucepan, then gently bring to a boil, whisking until the powder seamlessly dissolves.
- Sweeten and scent:
- Stir in the sugar (and vanilla if using) over low heat; taste for sweetness and adjust if you like.
- Divide and color:
- Pour the clear liquid evenly into six bowls—add a few drops of each color, swirling until you see a vivid red, orange, yellow, green, blue, and purple.
- Layer patiently:
- Pour the red mix into your mold, then wait about 7 minutes until it barely jiggles to the touch before gently adding the next color; repeat with each until your rainbow is built, and take your time (impatience makes swirls).
- Make coconut cream layer:
- In a fresh saucepan, stir agar-agar with water and coconut cream; gently simmer while whisking in sugar and that tiny dash of salt, right up to the moment it all melds.
- Finish with coconut:
- Once the final colored band feels set, slowly pour the still-warm coconut layer on top; leave it undisturbed to cool to room temperature.
- Chill and unmold:
- Slide the mold to your fridge for at least an hour; once firm, run a thin knife along the edge and invert with courage—a dramatic “plop” signals success.
- Slice and share:
- Cut into slices or cubes and serve cold, admiring every slice for its marbled, magical look.
 Save
Save 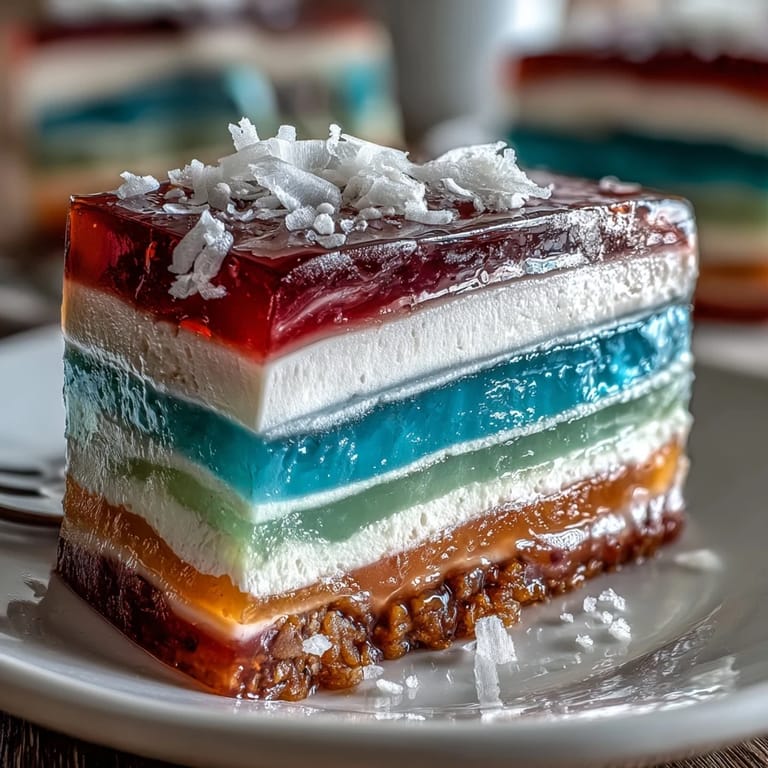 Save
Save Watching a roomful of kids and grownups marvel as they peeled back slices of jelly, I realized this dessert isn’t just a sweet treat—it’s a kind of edible celebration, instantly brightening even an ordinary gathering.
Tools That Make Assembly Fun
An offset spatula has become my secret for coaxing the jelly out of its mold in one swoop, and using measuring cups keeps every layer uniform and photo-worthy.
How to Personalize the Flavors
Swapping vanilla for rose or pandan extract changes the aroma entirely, and if you use natural colorings from juices or powders, you get subtle earthy undertones that surprise every time.
Common Stumbles and How to Fix Them
If you spot bubbles clinging to the mold, a quick pass with the spatula solves it; and if layers ever slip, just call it “tie-dye cake” and enjoy the new pattern.
- Press plastic wrap directly onto the jelly when chilling to prevent a dry skin.
- For perfectly even slices, dip your knife in warm water between cuts.
- Never rush pouring each layer—set times really matter here.
 Save
Save 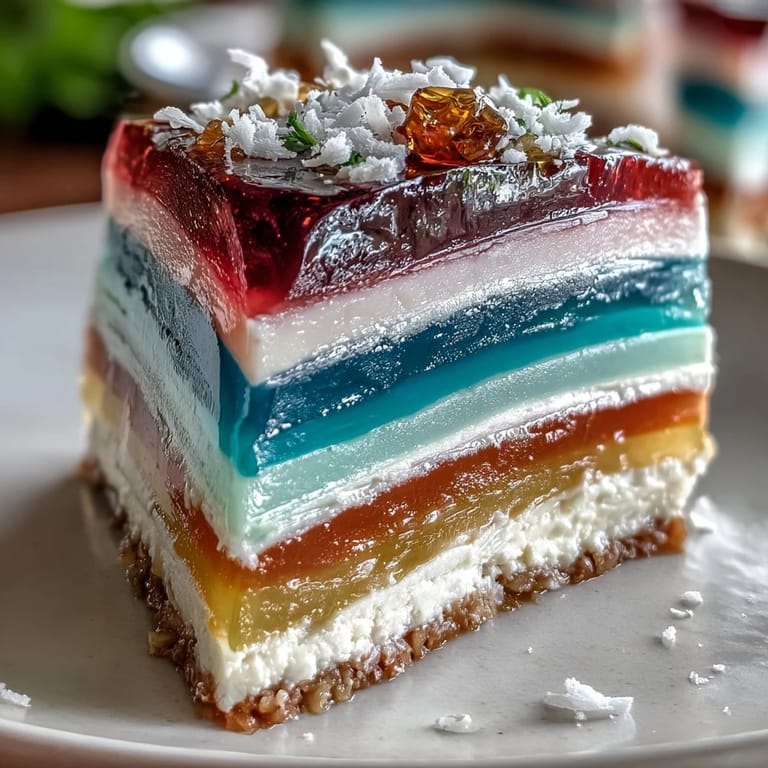 Save
Save This cake brings joy long after the last slice is gone—keep extra slices stashed for whenever you need a rainbow in your day.
Recipe FAQs
- → Can I substitute gelatin for agar-agar?
Gelatin behaves differently: it yields a softer, less firm gel and is not suitable for vegan diets. If you swap, adjust quantities and chilling time, but expect textural changes compared with agar-agar.
- → How do I prevent colors from bleeding between layers?
Let each colored layer become just set (slightly tacky but not liquid) before adding the next. Cooling for 5–8 minutes between pours and working with warm, not hot, mixtures helps preserve sharp layer lines.
- → What's the best way to get even layers?
Measure equal volumes for each color and pour from a low height to avoid splashes. Chill briefly between pours and level each layer with an offset spatula or the back of a spoon if needed.
- → How should I prepare the coconut cream layer?
Combine coconut cream, water and agar-agar, bring to a gentle simmer while stirring until agar dissolves, then sweeten and cool slightly before pouring over the last jelly color to avoid melting it.
- → Can I make this ahead and how long will it keep?
The cake keeps well refrigerated, covered, for up to 3 days. Chill fully before storing and slice with a warm knife for clean edges when serving.
- → Any tips for natural coloring and flavor variations?
Use concentrated natural colorings or plant-based juices for cleaner hues. For flavor, add pandan or rose extract sparingly to the jelly base or the coconut layer for subtle aromatic notes.